Showing posts with label China Glaze. Show all posts

Friday, September 27, 2013

Halloween Haul: China Glaze

Hi guys! So I went into Sally's today (there is one literally steps away from where I work, which is REALLY bad for my wallet) to get some more swatchie things (I don't know what they're called, I just call them swatchies), and I couldn't resist picking up a few more Halloween polishes (especially since I'm going on a no buy in October). 

I wandered into the China Glaze section and here is what I found: 

On the left is one of those "fuzzy"
 polishes. I never really saw the appeal to these because I don't know why you would want your nails to look like a fuzzy sweater. I figured if I was going to buy one, I might as well get a Halloween one. This one is called You're a Hoot, and it has black, yellow and orange matte bar glitter. It's from the On the Horizon collection, and I plan on doing some serious Halloween nail art with this. 

All the way to the right is Bump in the Night, and it's a textured polish. Again, I was never a big fan of these, but a few months ago a picked up an orange textured polish in the clearance bin at Sally's. I figured I can use both together for a Halloween mani. Here are swatches of these: 

The one in the middle is called Ghoulish Glow, and it's a glow in the dark top coat. Even though I JUST ordered a glow in the dark top coat in my Julep box, I couldn't help myself. 


This is after charging it near a lightbulb for literally 10 seconds. 

I'm so excited!!

xoxo
Belle

Friday, September 20, 2013

Fall leaves mani

Hi guys! Quick post with a fall mani I just did. 


Here's how:
1. One coat of ORLY Bonder
2. 2 thin coats of Tatiana by Julep
3. 1-2 coats of Bobbin' for Apples by Hit Polish
4. One coat of Gelous Advanced Nail Gel Coat
5. One coat of China Glaze No-Chip Top Coat. 

For accent nail: 
2. 2 thin coats of A-Taupe The Space Needle by OPI
3. 1 coat of Tough Coat by Winning Nails...I actually put drops in the spots I was going to put to leaves in rather than doing a flat coat
4. Placed fimo leaves with Mash nail art tweezers one at a time and held each one down for 30 seconds 
5. Another layer of Tough Coat over the whole nail 
6. One coat of Gelous
7. Top coat. 

Happy fall
<3

Belle


Tuesday, September 10, 2013

Subscription Review: Glitter Guilty Pleasures Box September 2013

Hi guys!

Today I'm going to review what was in my Glitter guilty pleasures box this month. If you didn't already know, GGP Is a subscription service where, for 15.99 a month (you can also do 3 or 6 month plans) you get a full sized polish, based on your specific preferences (you fill out a questionnaire where you list polishes you like and don't like, including colors and finishes. You can be as specific as you like. You also get a mini polish, that each subscriber gets, as well as a piece of artisan chocolate (or something else during the summer). Each chocolate or other item is from an independent company, and proceeds from the boxes go to supporting small businesses. 

So here was my box this month: 


My full sized polish, based on my preferences, is a glitter bomb with iridescent microglitters and neon hex glitters in green, blue, pink, and orange, called Neon Lights. This is definitely the only polish I have like this. I don't know how I feel about glitter bombs, because I'd rather have glitter in a base color (so that there are fewer layers and less chance of peeling/chipping) but this is pretty cool. It's very similar to Party Hearty, which is listed in the site, except Neon lights has orange instead of purple. 


I definitely like this color a lot better than the one I got in my previous box. That one was a light pink creme with orange holographic microglitters, white bar glitters and magenta and silver circle glitters. I put maroon and magenta in my dislike section, so I was a little disappointed when I saw them in the bottle. It's still pretty though, and the formula is really good. 


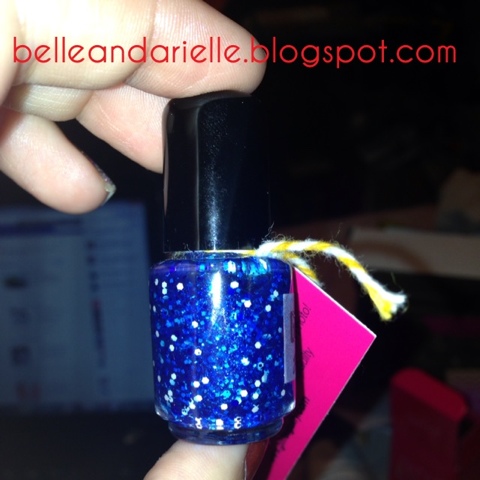
Moving on, the monthly mini polish is called Tight End, and it's a crelly with a blue base, dark blue microglitters, and blue and white circle glitters. This one I'm kind of eh about, since last month's mini was also blue (much lighter though). It was based off of the creator's football team's colors. This is a cute idea, even if you dont really follow football. Now for some swatches:


All the way to the left is Tight End over two coats of Frost bite by China Glaze. The third to the left is 3 coats of Tight End by itself. I think it looks MUCH better with a solid color under it. Second to the left is Neon Lights over two coats of White by Kleancolor. Second to the right is NL by itself, and all the way to the right is NL over two coats of Black by Kleancolor. I don't know if I like it over white or black better, I might do a mani where every nail has a different base color. 

The last thing in the box is a cute little bottle-top magnet that says "keep calm and paint your nails."  I love this, it's adorable, i only wish it was a keychain or something so I could carry it around with me! 

This is my second box, and I can't wait to see what she comes up with for Halloween. It should be noted that Jessica, the creator, has excellent customer service. I didn't get my box by a certain day, and I emailed her (on a Saturday.) She emailed me back promptly giving me the tracking number, some information about the shipment, and told me she would call the shipping company if I didn't receive my box in the next few days. She obviously puts a lot of time and care into her products. 

That's all for now...so keep calm and paint your nails!

Update:
Here is a manicure I used with Neon Lights as a Top Coat. Underneath is My Boyfriend Scales Walls and Black Onyx by OPI. I alSo used Orly Instant Artist in Platinum to make the stripes (which you can't really see...but I used them to separate the black and white). 


xoxo,
belle

Saturday, September 7, 2013

Nautical Nonsense

Hi! Just wanted to post a quick summer-is-basically-over mani: 


The base color is Julep's Dianna, that I got in the Big Picnic Mystery Box. It's a really pretty mint green, and it goes on so nicely. I love Julep polish because they're some of the only ones I've tried that don't leave bubbles on my nails. 

The thumb is a freehand attempt to draw a...boat steering wheel? (It probably has a different name). I used a nail striping brush. I did it in gold first, but it came out terribly, so I did silver over it. The effect wound up looking pretty cool by accident. Also used a striper for the pointer finger. I've seen stripe designs like this on Pintrest, and I love how it came out. 

Middle finger is from one of the Mash image plates #32. I used China Glaze Elephant Walk to stamp with. The circle around the compass is supposed to be really thin, but it kept not coming out, so I  just went over it with a striper brush. 

For the ring finger I looked up pictures of anchors and copied it. Before each rhinestone I put a coat of Tough Coat (clear nail art polish), and I used Mash nail art tweezers. 

The pinky is white nail tape. 

This is probably the second favourite manicure I've done (next to the Egyptian one). 

In other news, be prepared for a bunch of subscription reviews and multi-chrome polish swatches (I bought like 10 multichrome polishes and subscribed to a few more nail polish boxes [my bank account is crying]). That's all for now!

xoxo,
Belle


Sunday, September 1, 2013

Labor Day Nails!

Hey guys! Today I just have a quick post of a couple of patriotic manis for Labor Day. I used these for the 4th of July, but you can pretty much use them any time you're feeling patriotic. Onward!


For the thumb I used Mash image plate # 49, pointer finger is dark blue rhinestones, middle finger is star-shaped rhinestones, ring finger is blue and red nail tape over while nail polish, and the pinky is an acrylic bow. I don't own nail glue, instead I used Tough Coat by Winning Nails (got it at Sallys). It just looks like a clear top coat and its for bonding and sealing nail art. Believe it or not, the bows actually stayed on for about a week (one of them I had to remove manually). 


With this one I used the sponge technique, the same that people use to do ombré effects. You start with a base coat, then paint the nails the lightest of the three colors (in this case, it was white). Make a line of each color polish, right on top of each other, and then sponge it onto your nail. I would look on YouTube for sponging techniques if it is your first time (Laynie Fingers has a good one). I did not, and it took me like 2 hours, because I did it wrong (I rolled it on my nail, like you do with a nail stamper) and you're actually supposed to sort of tap it on. 

On top I used Kleancolor in Silver Star, which is a clear base with holographic stars, which I had to kind of pick out with the brush. I topped THAT with China Glaze Fairy Dust, and put a top coat over that. Because I had so many layers, the nails peeled off within a couple of days. I would probably go with 3D star decals
or something like that next time. Even though this mani didn't last that long, it got like 50 re-pins on Pintrest (which is a lot for me). 

Hope everyone has a relaxing and safe holiday (I know I'll be spending mine at work :-/)

xoxo
Belle

Tuesday, August 27, 2013

Walk like an Egyptian

Hi guys!

So this is probably my absolute FAVORITE manicure that I've ever done: 


Here's how I did it:

1. Base coat... I used Sally Hansen Powerful Acrylic gel, but you can use pretty much any base coat. 

2. 3 coats of Cowardly Lyin' by China Glaze. For some reason, it just wouldn't get to the level of opacity I wanted. I used thin coats though. 

3. Wait 10-30 minutes before stamping. For real. Or you'll regret it. 

Thumb: Mash image plate #35. 

Pointer finger: If you can't tell, I free-handed this with a nail art brush and acrylic paint. I SUCK at free hand painting (unlike Arielle, who is a naturally gifted artist) so it's not that great. You can get acrylic paint at any arts and crafts store or on amazon...they usually come in bundles of different colors and people use them a lot for nail art. They're also cheaper than nail polish. 

Middle finger: Mash image plate #36. I could not believe that they had an Eye of Horus image...which was probably what inspired the entire mani. I put a dark blue rhinestone right where the pupil of the eye would be. 

Ring finger: Bundle Monster plate #04. I had a REALLY difficult time with this image. All of my MASH images came out in one shot...this one took quite a while and I had to touch it up with a nail art brush. I used light blue nail tape on the top and the bottom of the cat. You can get like 30 rolls of nail tape in different colors for very cheap on amazon. 

 Pinky: Mash image plate #50

Finished it off with Seche Vite top coat. If you can't already tell, I like to do manicures where each nail is different, and I like to combine stamping, rhinestones, nail tape, and basically anything else I have lying around. Anyway, that's all for now, happy polishing!

xoxo,
Belle