Showing posts with label OPI. Show all posts

Saturday, September 28, 2013

Ellagee Manicure

Hi guys! Quick post...remember the Ellagee polishes I reviewed? Well I did a mani with two of them. Here it is: 


The base color is Lucerne-Tainly Look Marvelous by OPI. I then used the dabbing method to get the glitters from La Calavera Catrina by Ellagee. 

The accent nail is Shirley Temple, also by Ellagee, over one coat of My Boyfriend Scales Walls by OPI. Now, I used this as an accent color because I assumed it would be hot pink, the color in the bottle. What I did not account for was the fact that I am, indeed, a human, and that my body temperature is 98.6 degrees (F). 

Lesson: if you're going to use thermo polish, you better love the "warm" color, because, unless you live in Alaska, that's what color you're going to be wearing most of the time. I actually think the baby pink with sparkles is really pretty, and I'm sad that it's only an accent nail and not an entire manicure. 


I had the bottle by my computer and this happened. I thought it was pretty cool. 

I can't wait to go to work (...well...yes I can) because I'm constantly walking into freezers, handling ice, etc) so it will be cool to see the color change throughout the day. 

Bye for now,
Belle

Friday, September 20, 2013

Fall leaves mani

Hi guys! Quick post with a fall mani I just did. 


Here's how:
1. One coat of ORLY Bonder
2. 2 thin coats of Tatiana by Julep
3. 1-2 coats of Bobbin' for Apples by Hit Polish
4. One coat of Gelous Advanced Nail Gel Coat
5. One coat of China Glaze No-Chip Top Coat. 

For accent nail: 
2. 2 thin coats of A-Taupe The Space Needle by OPI
3. 1 coat of Tough Coat by Winning Nails...I actually put drops in the spots I was going to put to leaves in rather than doing a flat coat
4. Placed fimo leaves with Mash nail art tweezers one at a time and held each one down for 30 seconds 
5. Another layer of Tough Coat over the whole nail 
6. One coat of Gelous
7. Top coat. 

Happy fall
<3

Belle


Tuesday, September 10, 2013

Subscription Review: Glitter Guilty Pleasures Box September 2013

Hi guys!

Today I'm going to review what was in my Glitter guilty pleasures box this month. If you didn't already know, GGP Is a subscription service where, for 15.99 a month (you can also do 3 or 6 month plans) you get a full sized polish, based on your specific preferences (you fill out a questionnaire where you list polishes you like and don't like, including colors and finishes. You can be as specific as you like. You also get a mini polish, that each subscriber gets, as well as a piece of artisan chocolate (or something else during the summer). Each chocolate or other item is from an independent company, and proceeds from the boxes go to supporting small businesses. 

So here was my box this month: 


My full sized polish, based on my preferences, is a glitter bomb with iridescent microglitters and neon hex glitters in green, blue, pink, and orange, called Neon Lights. This is definitely the only polish I have like this. I don't know how I feel about glitter bombs, because I'd rather have glitter in a base color (so that there are fewer layers and less chance of peeling/chipping) but this is pretty cool. It's very similar to Party Hearty, which is listed in the site, except Neon lights has orange instead of purple. 


I definitely like this color a lot better than the one I got in my previous box. That one was a light pink creme with orange holographic microglitters, white bar glitters and magenta and silver circle glitters. I put maroon and magenta in my dislike section, so I was a little disappointed when I saw them in the bottle. It's still pretty though, and the formula is really good. 


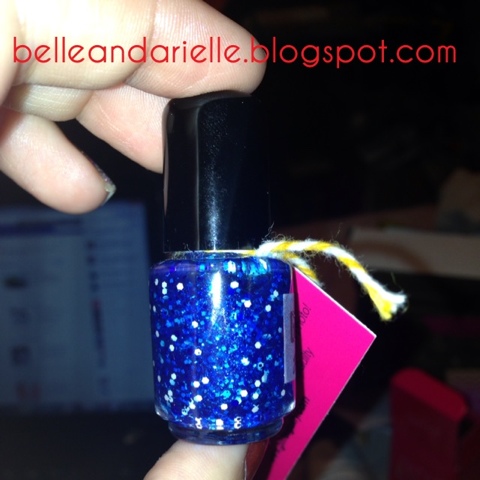
Moving on, the monthly mini polish is called Tight End, and it's a crelly with a blue base, dark blue microglitters, and blue and white circle glitters. This one I'm kind of eh about, since last month's mini was also blue (much lighter though). It was based off of the creator's football team's colors. This is a cute idea, even if you dont really follow football. Now for some swatches:


All the way to the left is Tight End over two coats of Frost bite by China Glaze. The third to the left is 3 coats of Tight End by itself. I think it looks MUCH better with a solid color under it. Second to the left is Neon Lights over two coats of White by Kleancolor. Second to the right is NL by itself, and all the way to the right is NL over two coats of Black by Kleancolor. I don't know if I like it over white or black better, I might do a mani where every nail has a different base color. 

The last thing in the box is a cute little bottle-top magnet that says "keep calm and paint your nails."  I love this, it's adorable, i only wish it was a keychain or something so I could carry it around with me! 

This is my second box, and I can't wait to see what she comes up with for Halloween. It should be noted that Jessica, the creator, has excellent customer service. I didn't get my box by a certain day, and I emailed her (on a Saturday.) She emailed me back promptly giving me the tracking number, some information about the shipment, and told me she would call the shipping company if I didn't receive my box in the next few days. She obviously puts a lot of time and care into her products. 

That's all for now...so keep calm and paint your nails!

Update:
Here is a manicure I used with Neon Lights as a Top Coat. Underneath is My Boyfriend Scales Walls and Black Onyx by OPI. I alSo used Orly Instant Artist in Platinum to make the stripes (which you can't really see...but I used them to separate the black and white). 


xoxo,
belle

Monday, August 26, 2013

Welcome and First Post

Hi guys! Welcome to Belle and Arielle* Nail Art Blog. Arielle and I are two best friends who have a serious passion for/addiction to nail art. We will be sharing our own manicures, reviewing products, etc. We are doing this out of our love for nail art, and nothing more. We hope that we can help to inspire others, as well as help to feed their nail art addiction. Being a nail art addict doesn't hurt anyone/thing, except maybe your wallet.

So I'm just going to jump in with my first post. This is my manicure that I have on right now:

I was inspired by the fact that it is almost fall, and I couldn't be more excited for my favorite season (please excuse the lack of clean-up on the accent nail). I wanted to do an accent nail, but I didn't want to do black, because it's not THAT close to halloween yet, and I also didn't want to do just plain white, so this is what I came up with.

And here is the arsenal of things I used to achieve this look:


From left to right:

1. Start with one coat of ORLY Bonder. Many beauty bloggers recommend this, and for good reason. It really helps the nail polish to stick to the nail to help prevent chipping/peeling. A few downsides of this product are that it does not protect against nail staining and/or breakage. However, for me it does what it's supposed to do, which is why it is an essential piece of my mani arsenal.

2. Apply one coat of Gelous Advanced Nail Gel Coat. This is pretty thick because it is supposed to make your nails like a gel, without having to expose them to UV light.

3. Apply two (thin) coats of Clubbin til Sunrise by OPI

4. Apply another coat of Gelous

5. Apply one coat of Northern Lights Top Coat by Out the Door. This was for the glitter. OTD top coats dry in 45 seconds. This top coat is made with fine glitters that tend to fall to the bottom, so you need to shake up the bottle. It creates a gorgeous sparkle effect that looks rediculous in the sun. Since this IS a top coat, you can stop here. But...

6. Apply one coat of Essie No Chips Ahead Top Coat. I work in a bakery-cafe, and I always have my hands in water and am cleaning/peeling/scraping things. Therefore, I really need nail products that prevent chipping as best as possible. I' ve accepted the fact that I cannot wear a manicure for more than a week, and this is the best combination of products that I have come across so far. It lasts almost a week without chipping, with minor touch-ups on tips needed to maintain the look. I did this on thursday night, and it's still going strong. *Warning: This is NOT a fast-drying top coat.

For accent nail:

Instead of step 3, apply two coats of My Boyfriend Scales walls by OPI. I waited about 10 minutes for it to dry (I don't have patience), but I suggest waiting at least 10-30 minutes if you're going to stamp. This is because, even if the nail is dry, you can still bend/smudge/smoosh the polish when you go to stamp, and then you have to start all over again. I may or may not have put on a coat of Seche Vite just on the accent nail to help the drying process.

The polish i used to stamp with is just called Black by Kleancolor. I used these polishes to stamp because, in my experience, these aren't really good quality polishes (they chip within a day) and they're kind of thick (which is good for stamping)  

The plate I used is Mash 38. The only stamping plates I have are Mash and Bundle Monster. I got BM first and I thought I was an idiot because it took me like a half hour to get one stamp on my nail. After I got the Mash plates, it only took my one try. I feel that the Mash plates are better quality and the designs are etched a little deeper than BM. But that's just my experience.

Finally, I used a Konad brand stamper and scraper. A lot of people use an old credit card instead of a scraper, but mine works fine, so I just use that. Finish with steps 4-6.

I hope you enjoyed the first post! If you have any questions about products/pricing, or if you like what you see, please leave a comment!

xoxo,
Belle <3


*not our real names.